- Pictures with Words
- Posts
- Making a RC51 live up to Honda's reputation.
Making a RC51 live up to Honda's reputation.
"Do or do not, there is no try" -Yoda
Scott Clayton
November 11, 2024
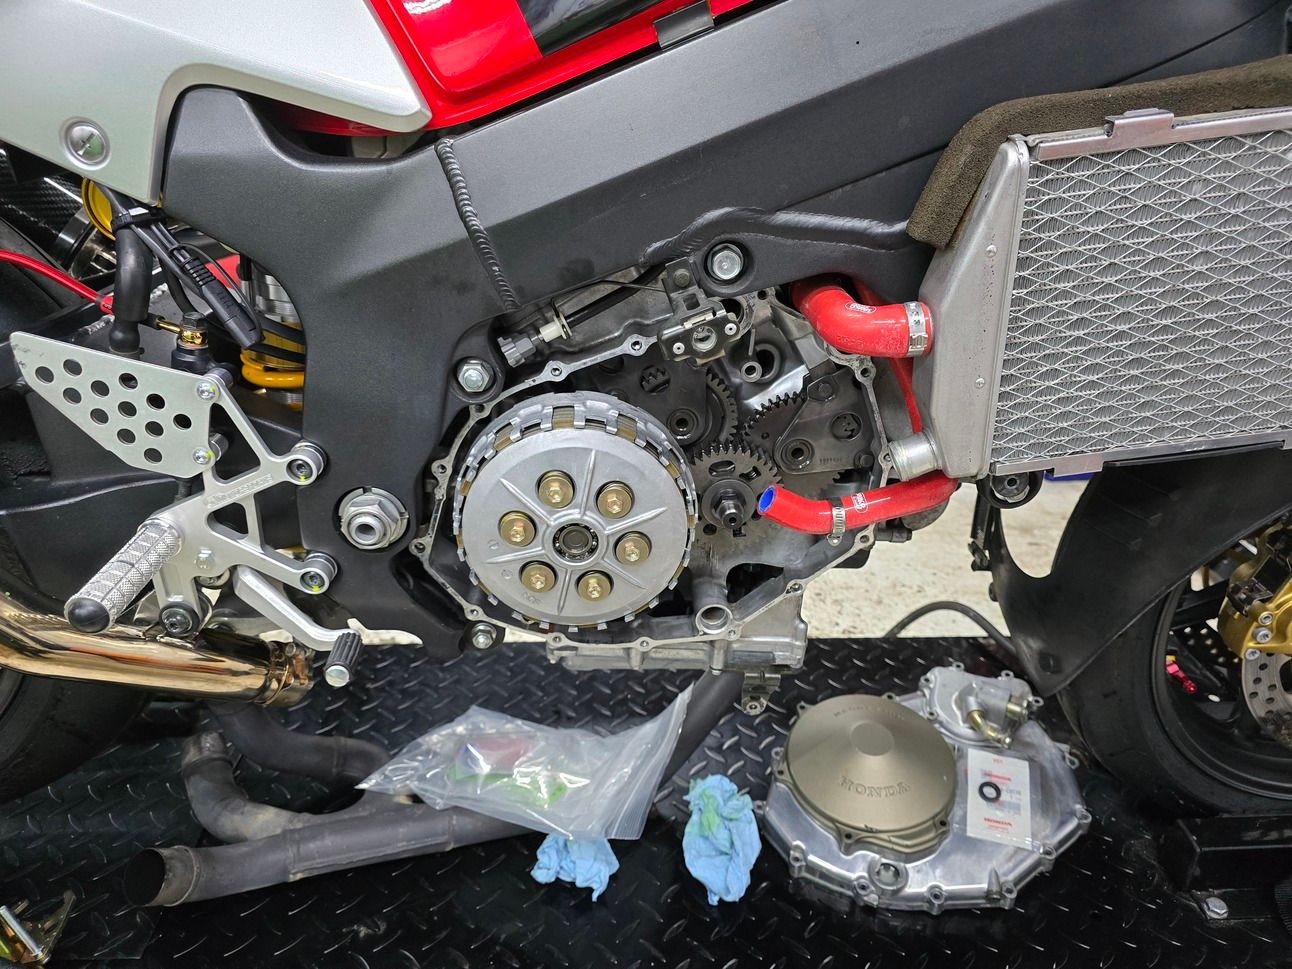
It’s a Honda, you have to remove both side fairings to do an oil change and you have to remove the front fairing to get access to the radiator cap. Luckily I didn’t have to remove the right side radiator to get to the water pump and right side crankcase cover.
There are rumors on the forums of RC51’s with 100,000 miles on them and still running strong. I have seen no proof, but with the reputation of Honda, I understand the point they are trying to make. My RC51 arrived with no Honda reliability, not at the fault of Honda, just the previous owner’s fault. And it turns out, it was my fault too.
Honda’s have this reputation of ultra-reliability. It seems like if you take care of anything, it’s going to be reliable, however Honda is known to be a step above.
One time I was working on a project, and my sweet wife wanted to help. There were some Slotted (-) wood screws that needed to be removed. I only had a Phillips (+) screwdriver on me. So she went into the garage to get a tool. A few minutes later, I checked on her to see how she was doing. She was using a wood chisel to remove the slotted screws. To anyone proficient with tools, the sight of this would make them cringe. Looking at it from her point of view: It had a handle like a screwdriver and it had a minus sign just like a flat bladed screwdriver; therefore it is an acceptable tool to use. She was only trying to help. Trying is the problem. Just like me, I was only trying to fix the leaking water pump on my RC51. “I’m guessing you found the coolant leak”, you may say? Yes, I did. And it’s clearly my fault.

It’s easier to see the crack with my phone camera zoomed in, than with the human eye.

You may recognize a photo like this from last week’s newsletter. Although now the right crankcase cover has been removed, so there is no need for an endoscope. With the coolant wiped off, you can see the discoloration on the water pump drive housing; where the coolant was leaking through. I cannot see a crack but when the aluminum heated up it probably flowed a lot more.

Here’s a photo from last week’s newsletter using the endoscope. Upside down compared to this week’s photo.
So last week I claimed, “I was following the manual.” This is not a binary statement, I should have stated how much I was following the manual. Did I use new seals? Yes. Did I, “Make sure the right crankcase cover remains perpendicular to the hydraulic press” as the manual states in fine print? Yes. Did I use every specialized Honda tool that they listed? Not all of them. Sockets that you would use for a ratchet are great light duty pressing equipment. Reviewing Honda’s manual and the pictures I took while performing this process four and a half years ago; the only thing I can come up with is too much force after something had bottomed out. My cheap Harbor Freight press does not have a pressure gauge on it. So, a spike or drastic increase in pressure would alert you that the objects you are pressing together have bottomed out; if it were a blind situation such as this. Which is knowledge I didn’t have back then, or else I would’ve bought one with a pressure gauge. Of course this knowledge is not stated in the Honda manual. It is assumed that you are competent in your hydraulic pressing abilities. Remember the “The Code Is More Like Guidelines, Than Actual Rules” Newsletter?
You can no longer buy a right side crankcase cover from Honda with the water pump drive mechanism and seals already installed anymore (part # 11300-MCF-000). However, there is used stuff on eBay and I have one coming. Which also means I either need to somehow test the seals on it before installation. Or install it and if coolant is coming out of the weep hole… I have another chance to do it without damaging the crankcase cover. I didn’t pull the right crankcase cover off of the eBay engine sitting in my garage because I would like to keep that as a whole engine. A complete spare engine and not an engine that’s been salvaged for parts. I will leave you with some pictures of installing new water pump seals back in early 2020. If you see something wrong, let me know.

I built a wooden jig because the water pump part of the crankcase cover is recessed.
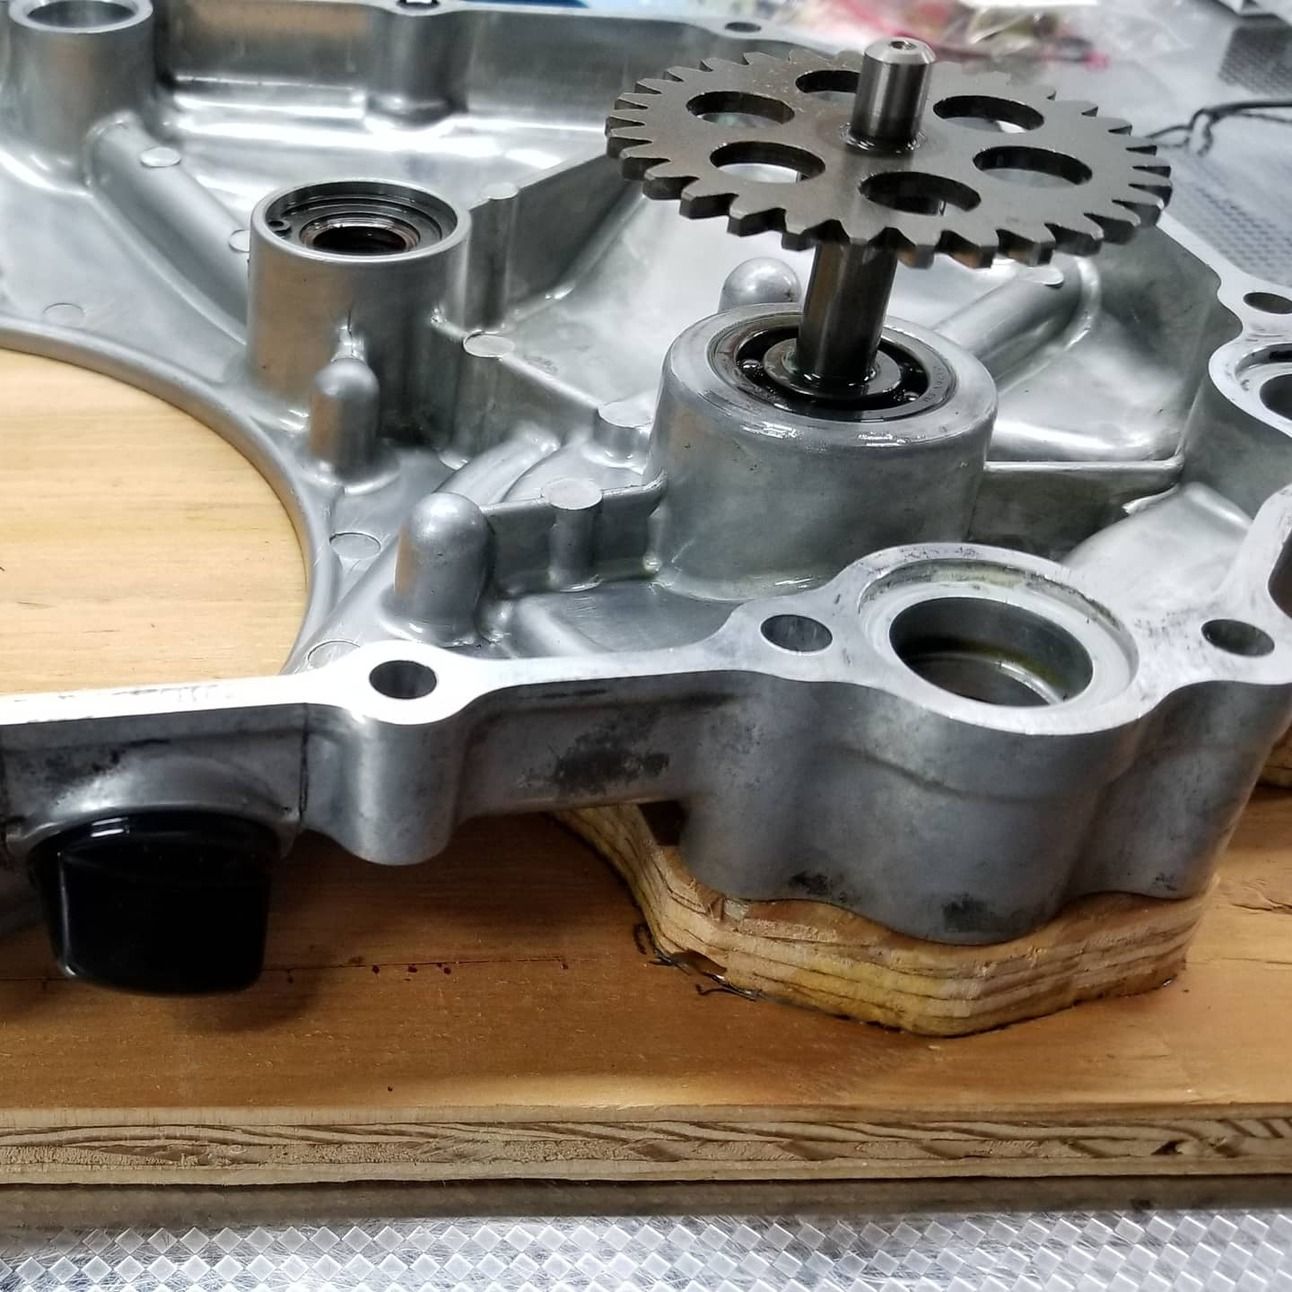
Now I have something flat to lay on the press.

Pressing out the impeller shaft out of the crankcase, mechanical seal and bearing. Once the gear hits the bearing, the bearing pushes the gear off the shaft. The special Honda support base (part # 07965-SD90100) was not used in this step. Even though nothing bottoms out in this process I have a feeling this is one of the steps where the crack was created.
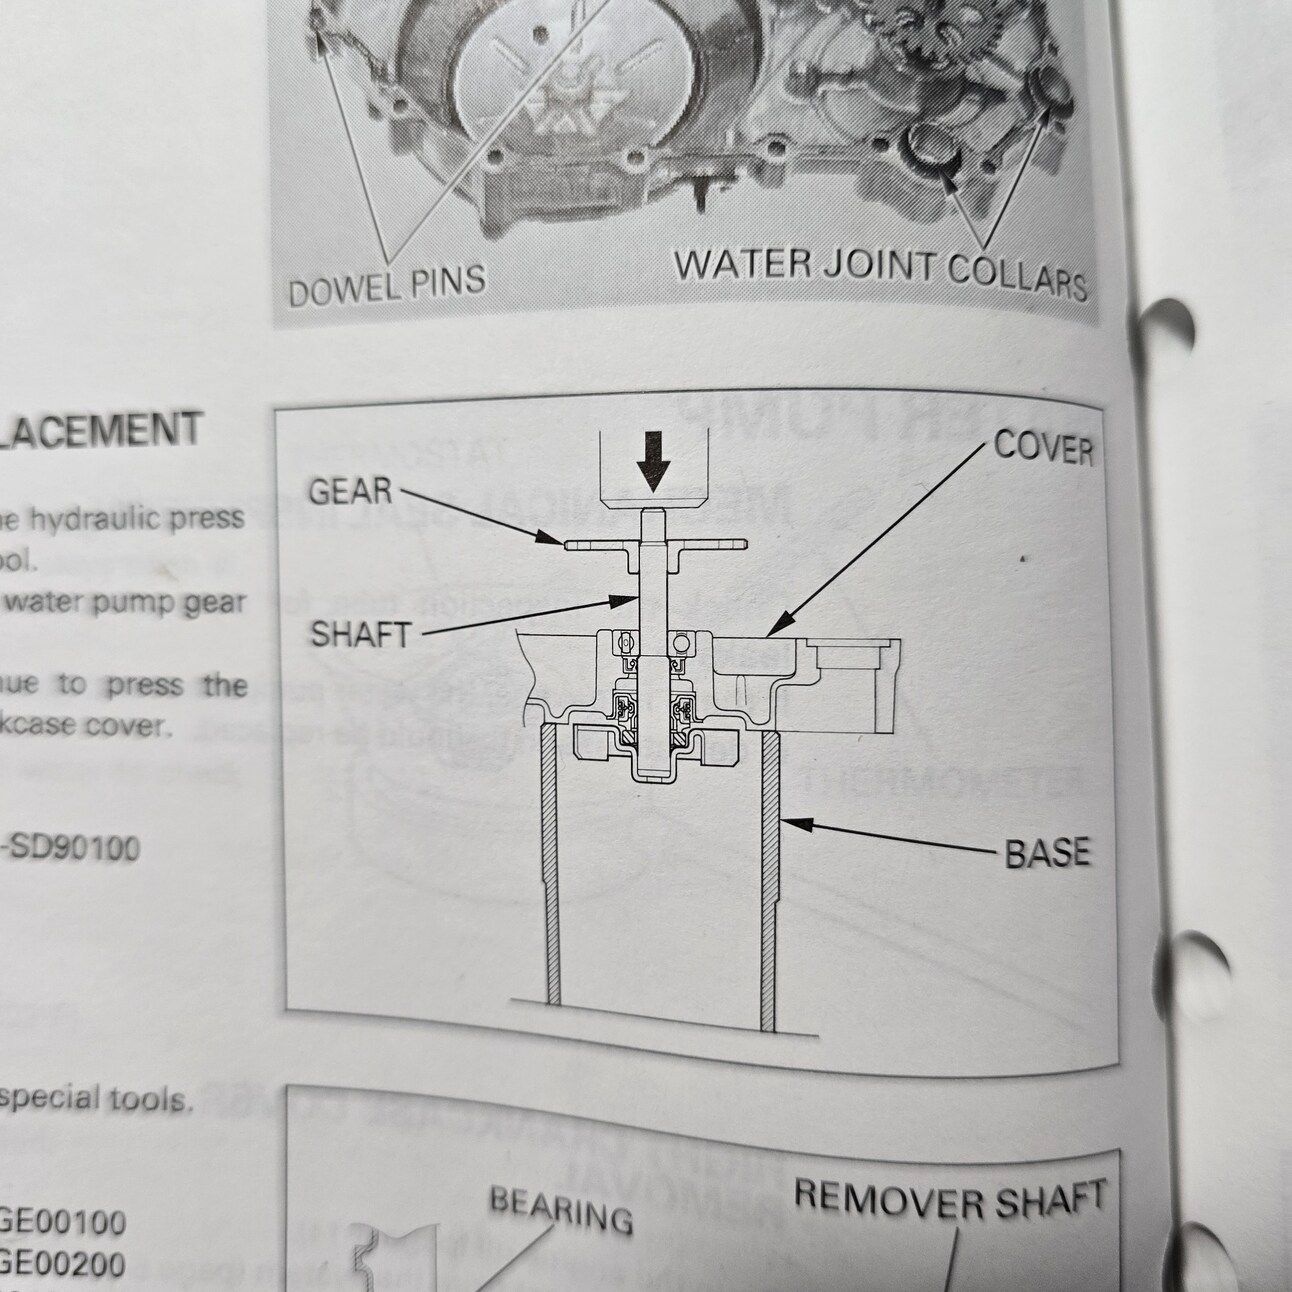
Honda’s diagram for this step. Does Honda’s Support Base narrow the load closer to the objects being pressed, where my jig spreads it out causing more stress on the aluminum in the center.
The only thing that bottoms out is the bearing. Did I use a hammer and socket or the press? I don’t remember, I didn’t take a picture of this process.

Minus the 22mm socket, Honda calls for a 22mm Pilot Collar (07PAF-0010680), I was using Honda’s special 58mm Seal Driver (07JAD-PH80101) which I found on eBay.
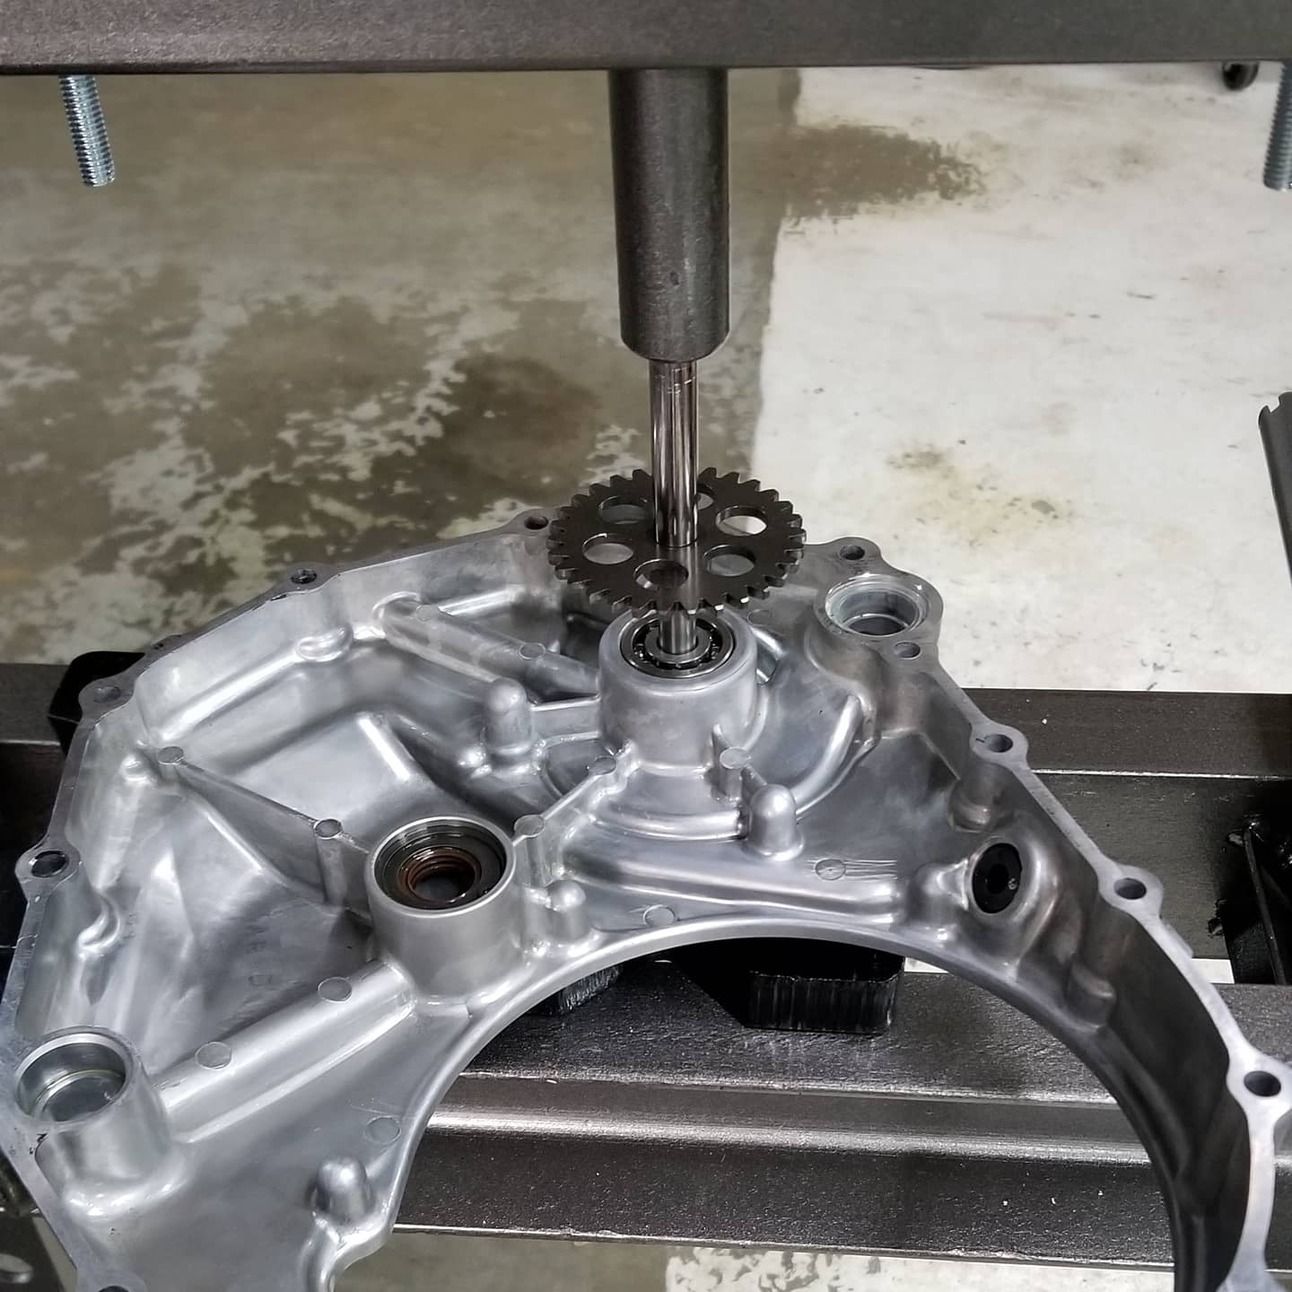
With Honda’s special Seal Driver under the case, I’m pressing the gear on to a height of 32.65 - 33.00 mm. The only object that bottoms out is the bearing.
The absolute best car reviewer is BACK! How can you not love this guy? His genuine animated excitement and enthusiasm for cars and driving makes him the best. Watch just one of his videos, you’ll be hooked. Chris Harris on Cars.
Reply